Showing posts with label budget. Show all posts
Showing posts with label budget. Show all posts
Saturday, December 7, 2013
If you noticed some changes…
It's because I just went through and purged a bunch of old posts including all the old weekly deal posts. And in the process found a couple of old drafts that I decided to publish. This is still really just a ghost site but I do try to check in on it every few months. I'm still battling Chronic Lyme disease and the last 2 months have been extremely rough for me, I'm thankful to currently be on the mend and starting to regain some strength. God bless.
Pin It


PALEO RECIPES

This Chili is For those of you who like it SPICY!!! It will make a huge pot of very meaty chili, it feeds our whole family with a little leftover, so you may want to scale it down for your family.
SPICY HOT CHILI WITH VEGETABLES
10 dried Ancho Chiles-chopped, stemmed and seeded (small-medium peppers, if you use bigger ones just use less)
1/2 cup water
1/4 cup white wine vinegar
 |
| Chopped Ancho Chiles soaking |
In small bowl, soak Chiles in water and vinegar for 30 minutes. After soaking puree the mixture in your blender or food processor until very smooth. Which takes about 5 minutes; set aside. I have tried both and my preference is the food processor.
3 pounds hot Italian sausage, casings removed
3 pounds ground beef
Place sausage and ground beef in a large, deep skillet. Cook over medium high heat until evenly browned. Then remove the meat from the pan and set aside in a large stock pot, reserving about 1/4 cup of the meat drippings in the skillet.
1 large white onion, chopped
1 large red onion, chopped
 |
| Onions, chopped, in the pan and ready to Saute. 4 cups chopped celery 4 cups chopped carrots 10 cloves of garlic, sliced In your large skillet heat the drippings over med-high heat and Saute your onions, celery, carrots, and garlic until the onions are soft.  1 tsp sea salt (or less, to taste) 1 tsp ground black pepper 1 (6 ounce) can tomato paste 1 cup dry red wine 4 (14.5 ounce) can tomato paste 1/4 cup hot sauce (I use Tapatio) 1 heaping Tbsp chili powder 2 tsp ground cumin 1 Tbsp fresh parsley (optional) 1/4 cup honey or agave (or less, to taste) Season with salt and pepper. Stir in tomato paste, and allow to caramelize. Then pour in the wine to deglaze your skillet. Add your sauted vegetables to the meat in the stockpot, adding the canned tomatoes, hot pepper sauce, chili paste (from your blender or food processor), honey, and seasonings. Bring to a boil, cover, reduce heat and simmer for 3 hours. Stir chili about every hour being sure to scrape the bottom.   This is a very versatile recipe, I added some extra fresh tomatoes today because they needed used. Use your imagination and enjoy! |
Tuesday, February 12, 2013
Grain Free Garlic and Herb Snack Crackers
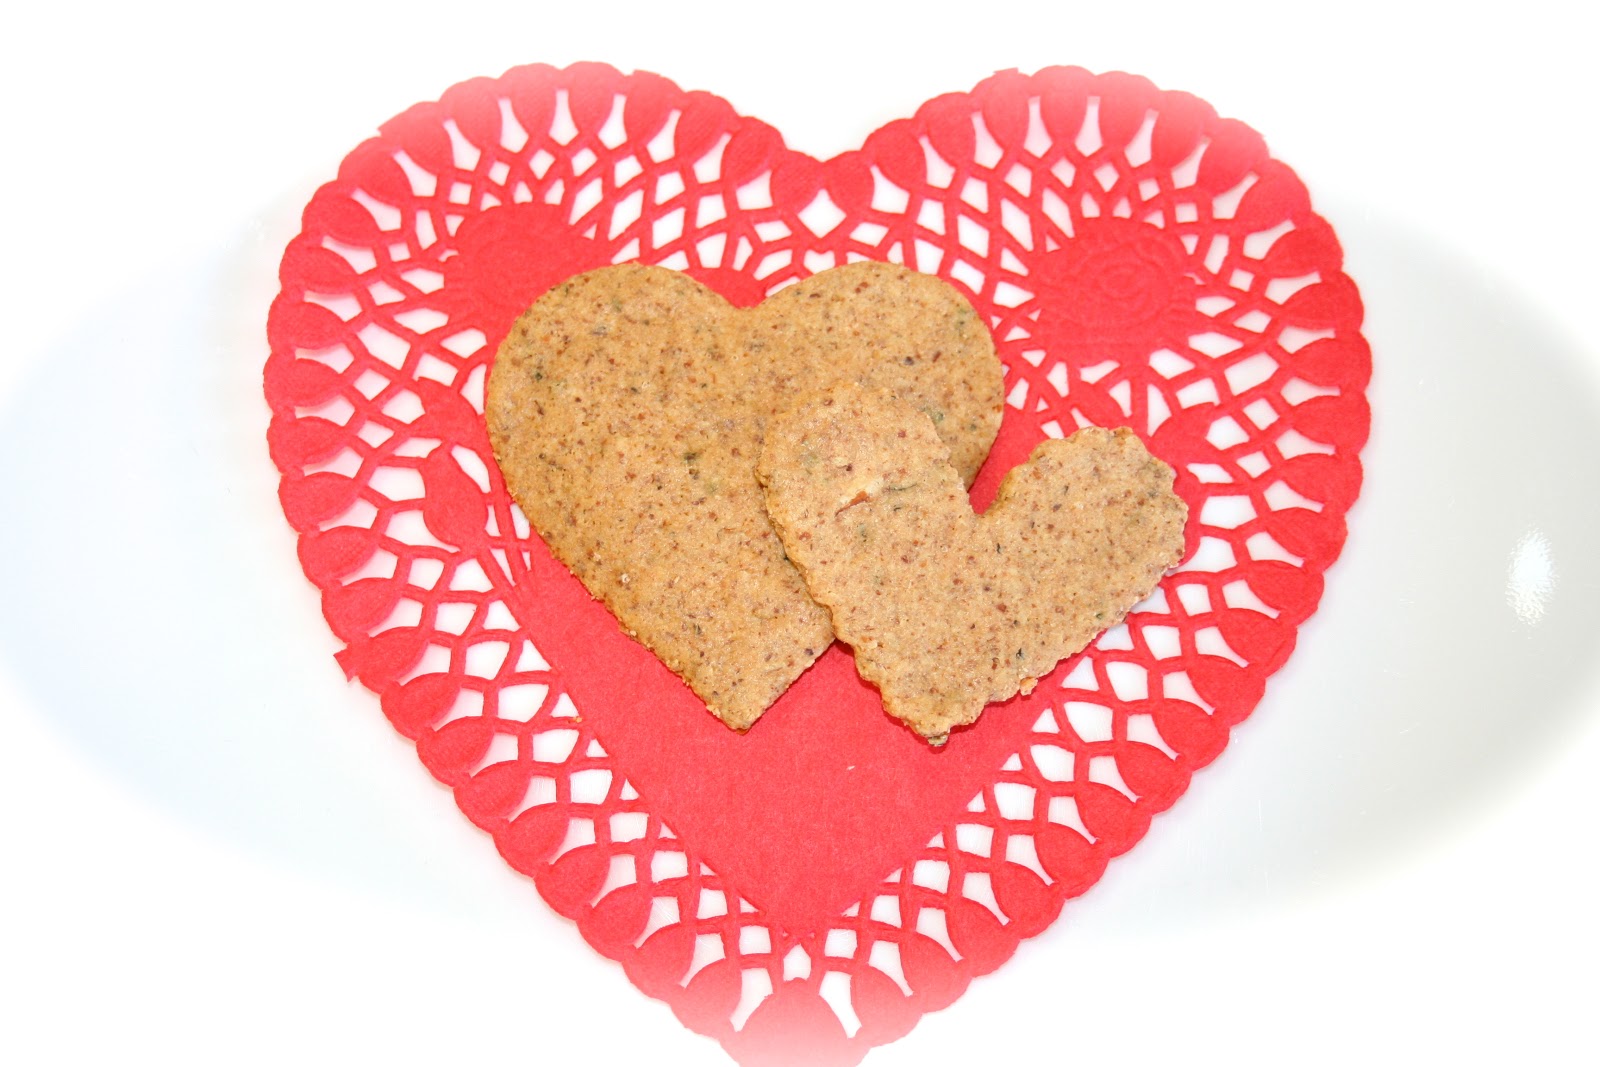
I though these would be a fun snack for the kids on Valentines Day. I used my recipe for Almond Meal Crackers, but after I rolled them out I used heart cookie cutters and then lifted them with a thin spatula onto a cookie sheet lined with parchment paper. The kids loved them, these take just a little more time to make than cutting them with a pizza cutter or pastry cutter, but it's well worth it.

2 slightly heaping cups of almond flour ( I make my own Unblanched Almond Flour)
2 eggs, slightly beaten
3 TBSP good quality olive oil ( or butter)
1/2 tsp sea salt (or more)
Garlic powder to taste ( about 1/4-1/2 tsp)
Dried Basil to taste ( about 1/2-1 tsp)
Oregano (about 1/4 tsp)
Rosemary ( optional)
Combine all of the above ingredients in a bowl and mix well until combined. Then knead the dough into a ball, place on a large sheet of parchment paper and flatten with your hands. Then cover with another sheet of parchment paper and roll out with a rolling pin until its thin ( about 1/8"). Then remove the top layer of paper and using a pizza cutter, cut dough into crackers or using a cookie cutter cut into shapes. If you are using a cookie cutter you will need to use a thin spatulat to lift them off the paper and move them to a parchment paper lined baking sheet. You may then re-roll the scraps and repeat the process. If you are not using the cookie cutter method then just slide the parchment paper onto a baking sheet and bake in a preheated oven of 325 degrees for about 20-30 minutes removing the ones on the edges as the get done more quickly and allowing the middle to finish baking. Remove from the oven and allow to cool completely, enjoy or store in an airtight container!


Pin It
Paleo And GF Crackers #2
( all almond flour)
2 slightly heaping cups of almond flour ( I make my own Unblanched Almond Flour)
2 eggs, slightly beaten
3 TBSP good quality olive oil ( or butter)
1/2 tsp sea salt (or more)
Garlic powder to taste ( about 1/4-1/2 tsp)
Dried Basil to taste ( about 1/2-1 tsp)
Oregano (about 1/4 tsp)
Rosemary ( optional)
Combine all of the above ingredients in a bowl and mix well until combined. Then knead the dough into a ball, place on a large sheet of parchment paper and flatten with your hands. Then cover with another sheet of parchment paper and roll out with a rolling pin until its thin ( about 1/8"). Then remove the top layer of paper and using a pizza cutter, cut dough into crackers or using a cookie cutter cut into shapes. If you are using a cookie cutter you will need to use a thin spatulat to lift them off the paper and move them to a parchment paper lined baking sheet. You may then re-roll the scraps and repeat the process. If you are not using the cookie cutter method then just slide the parchment paper onto a baking sheet and bake in a preheated oven of 325 degrees for about 20-30 minutes removing the ones on the edges as the get done more quickly and allowing the middle to finish baking. Remove from the oven and allow to cool completely, enjoy or store in an airtight container!

Dough ready to be rolled out.
 |
| Flattening the dough with my hands. |

Cutting out the shapes.

Baking

Yummy Garlic and Herb Crackers ready to eat.
Pin It
Tuesday, February 5, 2013
Paleo and GF Crackers
This is a very simple recipe, one that would be fun for children to help with or make depending on their age. They can help mix the dough, roll it out and even cut them into crackers. They may however need some help putting them in and taking them out of the hot oven, again depending on their age. My apologies for the cell phone photos, my internet is down for a few days while we wait for a new line to be installed, so I am having to post this from my phone, I hope to get higher quality, instructional photos up in the future.
I hadn't made crackers for a while, but two of my girls were sick with the stomach flu and were asking for crackers so I thought I would whip out a batch really quickly for them. In the past I've always made them with spices and they have tasted like Italian or pizza crust flavor. But today since the girls were sick I made them plain, and used the opportunity to experimented using Sunflower Seed flour for part of the flour. We really liked the nice nutty flavor that the Sunflower Seed Flour imparts. The idea for making Sunflower seed flour is does not come from me, it comes from a wonderful post written by the Paleo Parents last week using a Blendtec. I however, have been using the technique found on my post and video for making almond flour at home, and am happy to share that it can be made inexpensively with a Coffee grinder. Sunflower Seeds are much cheaper ( like $3-$4 less per pound than almonds) and using a coffee grinder you will end up with a wonderful, fine flour, perfect for baking (unless of course you already own a Blentec or Vitamix). Another huge advantage to grinding your own nut/seed flours is that you can soak them in advance, dehydrate them and then grind them into flour removing many of the anti-nutrients and making them more easily digestible (here is a little information on soaking : The Healthy Home Economist or How to soak and dehydrate nuts and seeds by: Mommypotamus if you are interested).
Feel free to experiment with these cracker recipes using different seasonings or maybe adding a couple tablespoons of sesame or poppy seeds.
I will give both recipes I've used for making Paleo and GF Crackers so that you may try them both if you like:

1 cup almond flour ( I made my own so if you are using store bought you may want to decrease this slightly)
1 cup of homemade sunflower seed flour, finely ground
1 egg, slightly beaten
1 tsp sea salt ( scant)
1 1/2 TBSP melted butter or olive oil ( your choice and does change the flavor slightly)
Seasonings or seeds of your choice
Combine all of the above ingredients in a bowl, mixing well to be sure it's well combined. Then knead the dough into a round ball, place on large piece of parchment paper, flatten with your hands slightly. Cover with another piece of parchment paper and roll out dough with a rolling pin, until its nice and evenly thin ( approximately 1/8"). Peel off top layer of parchment paper and using a pizza cutter, cut your dough into squares or whatever shape you would like. Slide the parchment paper onto a baking sheet and bake at 325 degrees for 20-30 minutes or until done, ovens vary so much it's a good idea to watch them closely the first time you make them. I also removed the ones on the edges and put the rest back in to finish baking as the edges will cook faster. Remove from the oven and let cool, I used the tip of a sharp knife to break or separate them where they stuck together. And that's it, then you get to enjoy them or store them in a airtight container ( ours rarely last that long). We got about 3 1/2 dozen crackers out of this.
2 slightly heaping cups of almond flour ( I make my own unblanched almond flour)
2 eggs, slightly beaten
3 TBSP good quality olive oil ( or butter)
1/2 tsp sea salt (or more)
Garlic powder to taste ( about 1/4-1/2 tsp)
Dried Basil to taste ( about 1/2-1 tsp)
Oregano (about 1/4 tsp)
Rosemary ( optional)
Combine all of the above ingredients in a bowl and mix well until combined. Then knead the dough into a ball, place on a large sheet of parchment paper and flatten with your hands. Then cover with another sheet of parchment paper and roll out with a rolling pin until its thin ( about 1/8"). Then remove the top layer of paper and using a pizza cutter, cut dough into crackers. Slide the parchment paper onto a baking sheet and bake in a preheated oven of 325 degrees for about 20-30 minutes removing the ones on the edges as the get done more quickly and allowing the middle to finish baking. Remove from the oven and allow to cool completely, enjoy or store in an airtight container!
Pin It
I hadn't made crackers for a while, but two of my girls were sick with the stomach flu and were asking for crackers so I thought I would whip out a batch really quickly for them. In the past I've always made them with spices and they have tasted like Italian or pizza crust flavor. But today since the girls were sick I made them plain, and used the opportunity to experimented using Sunflower Seed flour for part of the flour. We really liked the nice nutty flavor that the Sunflower Seed Flour imparts. The idea for making Sunflower seed flour is does not come from me, it comes from a wonderful post written by the Paleo Parents last week using a Blendtec. I however, have been using the technique found on my post and video for making almond flour at home, and am happy to share that it can be made inexpensively with a Coffee grinder. Sunflower Seeds are much cheaper ( like $3-$4 less per pound than almonds) and using a coffee grinder you will end up with a wonderful, fine flour, perfect for baking (unless of course you already own a Blentec or Vitamix). Another huge advantage to grinding your own nut/seed flours is that you can soak them in advance, dehydrate them and then grind them into flour removing many of the anti-nutrients and making them more easily digestible (here is a little information on soaking : The Healthy Home Economist or How to soak and dehydrate nuts and seeds by: Mommypotamus if you are interested).
Feel free to experiment with these cracker recipes using different seasonings or maybe adding a couple tablespoons of sesame or poppy seeds.
I will give both recipes I've used for making Paleo and GF Crackers so that you may try them both if you like:
Paleo and GF Crackers
( With Sunflower Seed Flour and almond flour)
1 cup almond flour ( I made my own so if you are using store bought you may want to decrease this slightly)
1 cup of homemade sunflower seed flour, finely ground
1 egg, slightly beaten
1 tsp sea salt ( scant)
1 1/2 TBSP melted butter or olive oil ( your choice and does change the flavor slightly)
Seasonings or seeds of your choice
Combine all of the above ingredients in a bowl, mixing well to be sure it's well combined. Then knead the dough into a round ball, place on large piece of parchment paper, flatten with your hands slightly. Cover with another piece of parchment paper and roll out dough with a rolling pin, until its nice and evenly thin ( approximately 1/8"). Peel off top layer of parchment paper and using a pizza cutter, cut your dough into squares or whatever shape you would like. Slide the parchment paper onto a baking sheet and bake at 325 degrees for 20-30 minutes or until done, ovens vary so much it's a good idea to watch them closely the first time you make them. I also removed the ones on the edges and put the rest back in to finish baking as the edges will cook faster. Remove from the oven and let cool, I used the tip of a sharp knife to break or separate them where they stuck together. And that's it, then you get to enjoy them or store them in a airtight container ( ours rarely last that long). We got about 3 1/2 dozen crackers out of this.
Paleo And GF Crackers #2
( all almond flour)
*updated 2/11/13
*updated 2/11/13
2 slightly heaping cups of almond flour ( I make my own unblanched almond flour)
2 eggs, slightly beaten
3 TBSP good quality olive oil ( or butter)
1/2 tsp sea salt (or more)
Garlic powder to taste ( about 1/4-1/2 tsp)
Dried Basil to taste ( about 1/2-1 tsp)
Oregano (about 1/4 tsp)
Rosemary ( optional)
Combine all of the above ingredients in a bowl and mix well until combined. Then knead the dough into a ball, place on a large sheet of parchment paper and flatten with your hands. Then cover with another sheet of parchment paper and roll out with a rolling pin until its thin ( about 1/8"). Then remove the top layer of paper and using a pizza cutter, cut dough into crackers. Slide the parchment paper onto a baking sheet and bake in a preheated oven of 325 degrees for about 20-30 minutes removing the ones on the edges as the get done more quickly and allowing the middle to finish baking. Remove from the oven and allow to cool completely, enjoy or store in an airtight container!
Pin It
Wednesday, January 16, 2013
Banana Crepes/pancakes and Our month of clean eating..
After an extremely busy month of December ( which included moving), and visiting family at Christmas we were feeling a real need to clean up our Paleo diet. We decided that my husband and I would do a Whole 30 followed by a 21 Day Sugar Detox and that our children 15 years old and under would do 30 days of Paleo eating. What we hadn't anticipated is that our two oldest sons, both adults living in our home (19 and 21) would decide that they too wanted to do a 30 day Paleo challenge. We were thrilled! It has made it much easier for the rest of us to stay on track because they aren't tempting the younger kids with treats, etc. And I know they will feel so much better, especially our oldest who has known problems with wheat and dairy but won't stop eating them completely (he will reduce his intake when he feels badly, and has a fiancee who keeps baking him wonderful treats). She is suddenly asking for Paleo dessert recipes, realizing that is going to be the only way she can bake for him this month though. With the two oldest they are really doing more of what we call a Robb Wolf 30 day challenge, just clean Paleo eating, with some dried fruit and occasional Paleo treats. And honestly I have no idea what they are really eating while not at home, it's really up to them and how far they want to take it. One thing they were running into their first week was being hungry all the time so I encouraged them to increase their fat intake and up their veggies (they tend to eat tons of meat, but slack on the veggies). It will be interesting to see how they feel, what they think about the experience and how they body composition changes over the 30 days.
As for our 5 younger ones (all under 15 years of age), we are just having them stick to Paleo and not "eat off the farm" for 30 days. They still get my Paleo Pancakes for breakfast, but only get one treat a week, on Friday or Saturday night they get to pick out a Paleo treat. Last weekend they chose to have our favorite Brownies from Elena's Pantry. The only hard part about that for me was not eating them ( I do confess to eating a crumb!), thankfully all 7 of them plus Jamie's fiancee polished them off the next day at lunch so I wasn't tempted to eat them! We feel that as children they don't need to feel like they are on a diet, and their little bodies need way more fuel/carbs than us big people, which is why we aren't being so strict with their 30 day challenge. As long as it falls into Paleo, we're okay with it and I've found that involving them in the prep and cooking process also helps get them more excited about it. I think this is a wonderful time of year to boost their little immune systems and heal their little guts, with all the serious flu going around this year. I'm also big on fermented foods/drinks and so are they, thankfully, several of them love Bubbies fermented sauerkraut and my oldest daughter has mastered making water kefir (which tastes like soda). My younger ones all love Kombucha too, but lately we've been going through it so fast I'm having to ration it. Maybe it's time to add in another 2 1/2 gallon jar in place of the 1 gallon I've been using. I actually make a total of about 6 gallons every 10-14 days depending on the weather and the warmth of our house.
For myself, I've noticed my gut is much happier (as someone who had severe IBS before going Paleo the tighter my diet is the better), inflammation from Lyme's seems to be in better control too, and I wish I could say I had more energy, but with the physical things I'm battling and medication I'm on I think they are preventing that. I have noticed that my body composition seems to be changing already (just 1 week in). I've done 3-4 Whole 30's so it's much easier this time around, I know what to do and that makes a big difference and makes for much "smoother sailing". I also started some light exercise yesterday, it's been a long time since I've been able to work out, with the lyme treatment and all, so I'm taking it very slowly and trying not to overdo it and put to much strain on my body. I'm looking forward to regaining some strength, the reality of how weak I'd gotten hit me hard on our trip to visit my brother. We went sledding with the kids, which was a blast, but I found I didn't have the strength to get up when I wiped out in the deep fluffy snow at the bottom. Something I've never had a problem doing before, I now had to roll to my knees to get up, it was then and there I decided I needed to do whatever I can do to regain some strength.
My husband, who works 2 jobs, his first as a Captain for the fire department has found it much easier this time around because one of the other men on his crew is also doing a Whole 30 so he is not the "odd" one out and they can encourage each other to stick with it. The one thing I worry about with him is sleep, you can have the best diet in the world but not see results if you're lacking sleep and under to much stress. Stress is a funny thing to, it doesn't have to be the kind of stress most of think of, it can also be physical stress we put on our bodies by doing something that is supposed to be healthy for us like working out, or in my husbands case doing a physically hard job with a lack of good sleep (his second job is construction).
Okay, enough about all that...time for a quick recipe. This isn't a new idea by any means, I've seen this floating around the internet for a while, and we've been enjoying them ( although usually with a different ratio, I prefer more eggs or I find them to sweet). While they are often called 2 ingredient banana pancakes, I prefer to think of them more as crepes. I think they would be amazing spread with homemade almond butter or Chocolate Pecan Almond butter. I do find that when I eat these I often need another protein like bacon, canadian bacon or ham on the side. Unfortunately if you are doing a Whole 30 you will need to wait until your 30 days are up to try these. But if you're on a 21 day sugar detox and you use greener bananas they are okay as far as I understand (I'm not as familiar with the 21 Day Sugar Detox). My kids have been enjoying these this past week...

2 medium size bananas
6 eggs
splash of real vanilla (gluten free)
and a generous sprinkling of cinnamon (to taste, I like a lot!)
Combine all of the ingredients in your blender and blend until smooth and a little frothy. Heat a griddle (I heat mine to about 300 degrees), grease well with coconut oil, ghee or butter. Pour small amounts of batter on and cook like you would pancakes. Remove and eat plain or topped with your desired toppings, these do not need any maple syrup as the bananas sweeten them naturally. They also make a great snack, my kids LOVE to nibble on these!


Pin It
As for our 5 younger ones (all under 15 years of age), we are just having them stick to Paleo and not "eat off the farm" for 30 days. They still get my Paleo Pancakes for breakfast, but only get one treat a week, on Friday or Saturday night they get to pick out a Paleo treat. Last weekend they chose to have our favorite Brownies from Elena's Pantry. The only hard part about that for me was not eating them ( I do confess to eating a crumb!), thankfully all 7 of them plus Jamie's fiancee polished them off the next day at lunch so I wasn't tempted to eat them! We feel that as children they don't need to feel like they are on a diet, and their little bodies need way more fuel/carbs than us big people, which is why we aren't being so strict with their 30 day challenge. As long as it falls into Paleo, we're okay with it and I've found that involving them in the prep and cooking process also helps get them more excited about it. I think this is a wonderful time of year to boost their little immune systems and heal their little guts, with all the serious flu going around this year. I'm also big on fermented foods/drinks and so are they, thankfully, several of them love Bubbies fermented sauerkraut and my oldest daughter has mastered making water kefir (which tastes like soda). My younger ones all love Kombucha too, but lately we've been going through it so fast I'm having to ration it. Maybe it's time to add in another 2 1/2 gallon jar in place of the 1 gallon I've been using. I actually make a total of about 6 gallons every 10-14 days depending on the weather and the warmth of our house.
For myself, I've noticed my gut is much happier (as someone who had severe IBS before going Paleo the tighter my diet is the better), inflammation from Lyme's seems to be in better control too, and I wish I could say I had more energy, but with the physical things I'm battling and medication I'm on I think they are preventing that. I have noticed that my body composition seems to be changing already (just 1 week in). I've done 3-4 Whole 30's so it's much easier this time around, I know what to do and that makes a big difference and makes for much "smoother sailing". I also started some light exercise yesterday, it's been a long time since I've been able to work out, with the lyme treatment and all, so I'm taking it very slowly and trying not to overdo it and put to much strain on my body. I'm looking forward to regaining some strength, the reality of how weak I'd gotten hit me hard on our trip to visit my brother. We went sledding with the kids, which was a blast, but I found I didn't have the strength to get up when I wiped out in the deep fluffy snow at the bottom. Something I've never had a problem doing before, I now had to roll to my knees to get up, it was then and there I decided I needed to do whatever I can do to regain some strength.
My husband, who works 2 jobs, his first as a Captain for the fire department has found it much easier this time around because one of the other men on his crew is also doing a Whole 30 so he is not the "odd" one out and they can encourage each other to stick with it. The one thing I worry about with him is sleep, you can have the best diet in the world but not see results if you're lacking sleep and under to much stress. Stress is a funny thing to, it doesn't have to be the kind of stress most of think of, it can also be physical stress we put on our bodies by doing something that is supposed to be healthy for us like working out, or in my husbands case doing a physically hard job with a lack of good sleep (his second job is construction).
Okay, enough about all that...time for a quick recipe. This isn't a new idea by any means, I've seen this floating around the internet for a while, and we've been enjoying them ( although usually with a different ratio, I prefer more eggs or I find them to sweet). While they are often called 2 ingredient banana pancakes, I prefer to think of them more as crepes. I think they would be amazing spread with homemade almond butter or Chocolate Pecan Almond butter. I do find that when I eat these I often need another protein like bacon, canadian bacon or ham on the side. Unfortunately if you are doing a Whole 30 you will need to wait until your 30 days are up to try these. But if you're on a 21 day sugar detox and you use greener bananas they are okay as far as I understand (I'm not as familiar with the 21 Day Sugar Detox). My kids have been enjoying these this past week...

Simple Banana Crepes/Pancakes
2 medium size bananas
6 eggs
splash of real vanilla (gluten free)
and a generous sprinkling of cinnamon (to taste, I like a lot!)
Combine all of the ingredients in your blender and blend until smooth and a little frothy. Heat a griddle (I heat mine to about 300 degrees), grease well with coconut oil, ghee or butter. Pour small amounts of batter on and cook like you would pancakes. Remove and eat plain or topped with your desired toppings, these do not need any maple syrup as the bananas sweeten them naturally. They also make a great snack, my kids LOVE to nibble on these!


Pin It
Saturday, December 1, 2012
Apple and Raisin Oven Pancake
My apologies for the low quality picture in this post, unfortunately our computer has been broken for a while now (another reason my Kombucha post isn't up yet). So I have to do everything on my phone, which if you can imagine is a bit cumbersome, since I can only type letter by letter on a tiny screen. And I don't have access to all my photos either so I had to copy and paste this one from my Facebook page. All that to say we have really been enjoying this and just wanted to share it with you all. I've Been extremely busy with life and moving so i just took a few moments to put this post together. Like my Quick and Easy Oven Pancake this is still quick and easy! And because my children love to douse everything in pure maple syrup I don't add any to the batter, however you could try that if you're not going to be topping it with syrup. Maybe 1-2 TBSP, but honestly I haven't tried that yet, we love it just the way it is. Hope you enjoy and Merry Christmas to everyone!
Delicious Apple and Raisin Oven Pancake
2 very large apples thinly sliced (or 3 med/large apples)
1/2 cup organic raisins
2 TBSP coconut oil
1/2 cup coconut milk ( full fat milk)
1 tsp cinnamon ( I use Saigon cinnamon)
Pinch of allspice
Pinch of nutmeg
FOR THE BATTER:
12 eggs
1 3/4 cup full fat coconut milk ( or one can Thai kitchen 13.66 ounce)
2 cup almond flour
2 tsp cinnamon
4 tsp vanilla
1/2 cup butter (1 stick)
Grease a 9x13 inch pan. Sauté apples in coconut oil for a few minutes over med- med high heat, until they start to soften. Add remaining ingredients and sauté until slightly thickened and reduced ( a couple of minutes). Preheat your oven to 375 degrees. Pour apples and raisin mixture into greased glass pan and combine the ingredients for the batter in the following manner:
Combine the batter ingredients in a medium bowl, (not the butter) and beat for 1-2 minutes. Then pour into pan over the apples and raisins and top by drizzling the melted butter over it. Place in the oven and bake for about 40-50 minutes or until golden brown and done in the middle ( watch it near the end in my experience oven temps can vary greatly). Top with some maple syrup and some whipped coconut milk and you are in for a treat!
 Pin It
Delicious Apple and Raisin Oven Pancake
2 very large apples thinly sliced (or 3 med/large apples)
1/2 cup organic raisins
2 TBSP coconut oil
1/2 cup coconut milk ( full fat milk)
1 tsp cinnamon ( I use Saigon cinnamon)
Pinch of allspice
Pinch of nutmeg
FOR THE BATTER:
12 eggs
1 3/4 cup full fat coconut milk ( or one can Thai kitchen 13.66 ounce)
2 cup almond flour
2 tsp cinnamon
4 tsp vanilla
1/2 cup butter (1 stick)
Grease a 9x13 inch pan. Sauté apples in coconut oil for a few minutes over med- med high heat, until they start to soften. Add remaining ingredients and sauté until slightly thickened and reduced ( a couple of minutes). Preheat your oven to 375 degrees. Pour apples and raisin mixture into greased glass pan and combine the ingredients for the batter in the following manner:
Combine the batter ingredients in a medium bowl, (not the butter) and beat for 1-2 minutes. Then pour into pan over the apples and raisins and top by drizzling the melted butter over it. Place in the oven and bake for about 40-50 minutes or until golden brown and done in the middle ( watch it near the end in my experience oven temps can vary greatly). Top with some maple syrup and some whipped coconut milk and you are in for a treat!
Tuesday, August 14, 2012
Slow Cooker Asian Pork
Slow Cooker Asian Pork
I tried a new recipe last night that I found on chowstalkers, it's from the blog, http://hollywouldifshecould.net/2011/04/easy-weeknight-paleo-crockpot-recipe/.
I tried a new recipe last night that I found on chowstalkers, it's from the blog, http://hollywouldifshecould.net/2011/04/easy-weeknight-paleo-crockpot-recipe/.
It's really quite good, there are just a few changes I made to make it more to our liking.
And I might add, that last night it was nice and juicy, but today it seems to need a sauce. I think that my Faux Thai "Peanut" Sauce, makes it even better! With those few changes it's a winner. I used Pork Sirloin Roast and cooked it for 5-6 hours on low, shredded it, put it back in the crock pot and cooked for about another 30 minutes on high. Then served it, we liked it with grated cabbage, shredded carrots, sliced almonds and chopped cilantro. Oh and a dash more of the hot chili sauce, yummy!
Here is the modified version of her recipe:
And I might add, that last night it was nice and juicy, but today it seems to need a sauce. I think that my Faux Thai "Peanut" Sauce, makes it even better! With those few changes it's a winner. I used Pork Sirloin Roast and cooked it for 5-6 hours on low, shredded it, put it back in the crock pot and cooked for about another 30 minutes on high. Then served it, we liked it with grated cabbage, shredded carrots, sliced almonds and chopped cilantro. Oh and a dash more of the hot chili sauce, yummy!
Here is the modified version of her recipe:

For the meat:
2-3 lbs of pork shoulder or any type of pork roast
Liberally salt and pepper
3 smashed whole garlic cloves.
For the sauce:
Mix all of the following:
4 TBS Coconut Aminos
1/4 cup Almond Butter
1 TBS Honey
2 TBS Vinegar (I used the Bragg's apple cider vinegar)
2 tsp Sesame Oil
2 TBS A Taste of Thai Garlic Chili Pepper sauce
1/2 tsp of Black Pepper
1 TBS minced ginger
Recipe
Put prepared meat in crockpot, with the salt, pepper and garlic. Combine ingredients for the sauce and pour over the meat. Then set it on low and forget it. She suggests 4-6 hours, I found mine took about 6-7 hours. I cook mine, shred it and put it back in for another 1/2 hour. That's it, you can prepare all of your toppings or garnishes before hand to save time to, and the leftovers make great leftovers for lunch. I even like it cold the next day!
When it is done cooking serve a top your favorite garnish. You can use whatever toppings you would like these are just some suggestions-- jicama, cilantro, shredded carrots, shredded cabbage, green onions, sliced almonds,Kelp noodles, etc..

Toppings

Ingredients I used
Pin It
Sunday, July 22, 2012
Quick and Easy Homemade Non-Dairy Strawberry Ice Cream
We were at our friends cabin recently, it was very, very, hot and ice cream was sounding really good. I came up with this quick and easy version of non-dairy strawberry ice cream for my kids. Since we were on vacation it was one of those times I didn't want to spend a bunch of time in the kitchen. The beauty of this recipe is that you can have delicious ice cream bursting with Strawberry flavor with out requiring much time or work and only takes a few ingredients.

1 1/2- 2 cups roughly chopped ripe organic strawberries
1 can full fat coconut milk (I like Native Forest because they have no BPA in their cans)
1/2 cup raw local honey (mine has a very mild flavor, so adjust accordingly)
1 tsp vanilla
Combine all ingredients in a blender, and blend briefly. Pour into a glass bowl and chill in the refrigerator a minimum of 6 hours. After your mixture has chilled, pour into your ice cream maker and chill for the amount of time your manufacturer suggests. I have a Cuisinart (the kind where you just freeze the bowl and don't use ice), it only takes about 15- 20 minutes to churn a batch of delicious ice cream. It's that simple and very refreshing!


Pin It

QUICK AND EASY NON-DAIRY STRAWBERRY ICE CREAM
1 1/2- 2 cups roughly chopped ripe organic strawberries
1 can full fat coconut milk (I like Native Forest because they have no BPA in their cans)
1/2 cup raw local honey (mine has a very mild flavor, so adjust accordingly)
1 tsp vanilla
 |
| Ingredients for Non-dairy Strawberry Ice Cream |

Strawberry Ice Cream with my Strawberry sauce (I pureed the strawberries this time).

My favorite Ice Cream maker, love this thing!
*Note* My apologies for the poor quality photos, I left my good camera at the cabin unfortunatly.
Saturday, June 30, 2012
Delicious Grain Free/"Paleo" Waffles
This was originally my pancake recipe but we've been using it to make wonderful waffles for a while now. It makes waffles that are nice and crunchy on the outside, yet fluffy on the inside. And the taste is out of this world topped with some fresh whipping cream (or whipped coconut milk), maple syrup and berries.

Delicious Grain Free/"Paleo" Waffles
2 cups almond meal (I use my own homemade almond meal/flour)
4 eggs
1/2 cup sparkling water ( I like to use one with Orange essence), you may use regular water but the sparkling water is what helps make them fluffier.
4 TBSP oil of your choice (if you use coconut oil, be sure to melt it first)
1-2 TBSP maple syrup
2 tsp vanilla
2 tsp cinnamon (optional)
1/2 tsp sea salt
1 tsp baking soda
Preheat your waffle iron. In a medium mixing bowl combine all of the dry ingredients and mix well. Then add the all the remaining wet ingredients and mix to combine. Next using a hand mixer beat the batter ingredients for 1 minute, this will help make a fluffier batter and better waffles. Lightly grease your waffle iron and place about 3/4 cup of batter (or the amount per the directions for your particular model of waffle iron). I cook my waffles for 5 minutes and they turn out perfect every time, but you will need to experiment with your waffle iron to find the amount of time that works best for yours. Remove from waffle iron and serve with your desired garnishes.
Pin It

Delicious Grain Free/"Paleo" Waffles
2 cups almond meal (I use my own homemade almond meal/flour)
4 eggs
1/2 cup sparkling water ( I like to use one with Orange essence), you may use regular water but the sparkling water is what helps make them fluffier.
4 TBSP oil of your choice (if you use coconut oil, be sure to melt it first)
1-2 TBSP maple syrup
2 tsp vanilla
2 tsp cinnamon (optional)
1/2 tsp sea salt
1 tsp baking soda
Preheat your waffle iron. In a medium mixing bowl combine all of the dry ingredients and mix well. Then add the all the remaining wet ingredients and mix to combine. Next using a hand mixer beat the batter ingredients for 1 minute, this will help make a fluffier batter and better waffles. Lightly grease your waffle iron and place about 3/4 cup of batter (or the amount per the directions for your particular model of waffle iron). I cook my waffles for 5 minutes and they turn out perfect every time, but you will need to experiment with your waffle iron to find the amount of time that works best for yours. Remove from waffle iron and serve with your desired garnishes.
Pin It
Sunday, June 24, 2012
How to make your own Almond Meal and Nut Butters
Here is the post I've been promising you all, on How to Make Your Own Almond Meal and Nut Butters. Being the budget minded person that I am, I was so thankful to have friends who shared with me just how easy it is to make almond flour and nut butters. If it weren't' for their reassurance I don't know if I would have ventured to give it a try. I've done some experimenting with different methods of making both, and I'm looking forward to sharing with you what I've found to be the simplest, easiest way of doing it.
raw almonds (I use these from Costco)
Coffee grinder
sifter
bowl or container for sifting the flour into

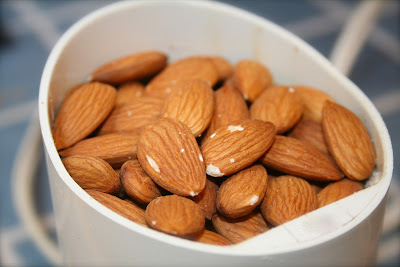


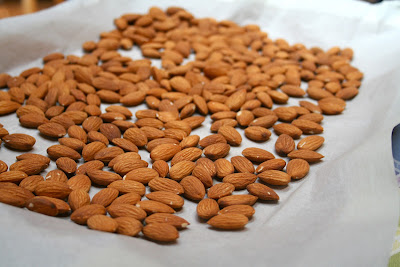
It is a really quick process, repeat the steps until you have the desired amount of almond meal, store in an airtight container (and in the freezer for longer storage if you like). That's it, it's that simple.

Pin It
To view larger, just click on the You Tube link in the right hand corner.
To make Almond Meal/Flour you will need the following:raw almonds (I use these from Costco)
Coffee grinder
sifter
bowl or container for sifting the flour into
- Place a small amount of almonds (like you would coffee beans) in your coffee grinder. I have a Krups which works great for this, I however only use it for making almond meal and don't suggest using it for both coffee and among meal.
- When you are ready push the button or on my model the lid, and let it grind, I usually give it a few shakes while grinding. It will only take a few seconds to process, it's amazing how quick it is. Check after a few seconds to see if the grind is fine enough, if not process a little more until it's your desired texture, you just don't want to let it go to long or it will start to turn into almond butter.
- When it reaches the desired texture or grind pour into your sifter and sift away. Any remaining chunks of almond that are to large can be reground with the next batch, on their own, or throw them in with your next batch of almond butter.


To Make Almond Butter:
raw almonds (I use these from Coscto)
Jelly roll pan or other large baking pan
Food Processor
sea salt (if desired)
Coconut oil (if desired)
- Start by preheating your oven to 350 degrees.
- Spread desired amount of almonds out into your pan, 2-3 cups is usually good depending on the size of your food processor. Mine is an 11 cup Cuisanart and handles 2 cups with ease, 3 cups or more requires a little assistance from me along the way.
- Place pan in the oven and bake for 10-15 minutes to toast the almonds.
- Remove almonds from the oven and pour into your food processor with the regular blade attachment on ( do this directly from the oven and don't cool them off).
- Turn on your food processor and let it grind away, that's it. When I do larger amounts I sometimes have to stop it part way and stir so the sides get mixed in well. But when I do 2 cups I just let it go and walk away. It does it all on it's own. I generally don't add oil and just let mine grind until it's pretty soft and runny in texture.
- However, if you want to up your consumption of coconut oil, or maybe you just prefer the taste, you made add 1-2 TBSP of coconut oil, macadamia nut oil or any other desired nut oil, part way through the process. I add it when it starts to get a little dry and crumbly, which is about half way thru the process.
- If you like you may also add a pinch of sea salt near the end.


Once again a very easy process, and so good!! I love it when it's fresh and still warm, yum! You can do the same with any nut you like, I also like to make sunflower seed butter too. I watch them very closely while roasting and give them a stir now and then. But processing them is the same technique, I do add some oil to my sunflower seed butter, otherwise it just seams to be to dry. You can experiment with the oils too, I like using some Macadamia Nut oil, it adds a wonderful flavor.
So there you have it, both processes are really quite simple and can save you a little money too. I figure making my own almond meal saves me about .50-.60 cents per pound. And making my own almond butter saves me about $1.50 per pound, and it puts you in control of what goes in to it (like combining nuts etc, ). You can also experiment with adding some flavoring to your nut butters, like vanilla, cinnamon, cocoa powders, honey, etc. I would love to hear what kind of combinations you come up with. I hope this post has been both helpful and inspiring! Enjoy!
Pin It
Wednesday, June 20, 2012
Quick and Easy "Paleo" Oven Pancake
I found a recipe for an oven pancake on Pinterest the other day and decided to convert it. In the conversion process I also added some vanilla and cinnamon to it and the end result was something we all loved!! It reminds me of Overnight French Toast in our pre-paleo days. This is so quick and so easy, and really tasty, and if you know me at all you know I love that combination (quick, easy and tasty)!
Quick and Easy Paleo Oven Pancake
6 eggs
1 cup full fat coconut milk
1 cup almond flour
1 tsp cinnamon
2 tsp vanilla
1/4 cup butter (1/2 a stick), melted
Pin It
 |
| Thicker version, double batch in a 9x13" pan. |
Quick and Easy Paleo Oven Pancake
6 eggs
1 cup full fat coconut milk
1 cup almond flour
1 tsp cinnamon
2 tsp vanilla
1/4 cup butter (1/2 a stick), melted
Preheat oven to 400 degrees. Grease a 9x13 inch pan well (be sure it's good and thick), combine the above ingredients in a medium bowl, beat for 1-2 minutes. Then pour into pan and pour melted butter over the top, move to the oven and bake for about 30 minutes or until done. This will make a thin oven pancake, for a thicker one like I have in the photos you will need to either double this recipe or use a 8x8 pan instead. We like it both ways, thin and thick, but to feed my crew I need to make it thicker so more of them get fed! Top with some maple syrup and you are in for a treat!
*TIP*
I poured our maple syrup into a simple squeeze bottle with a small tip and it works wonderful, now we can just drizzle the syrup instead of pouring. And the kids can do their own now because they have better control.
*TIP*
I poured our maple syrup into a simple squeeze bottle with a small tip and it works wonderful, now we can just drizzle the syrup instead of pouring. And the kids can do their own now because they have better control.
Hope you enjoy!
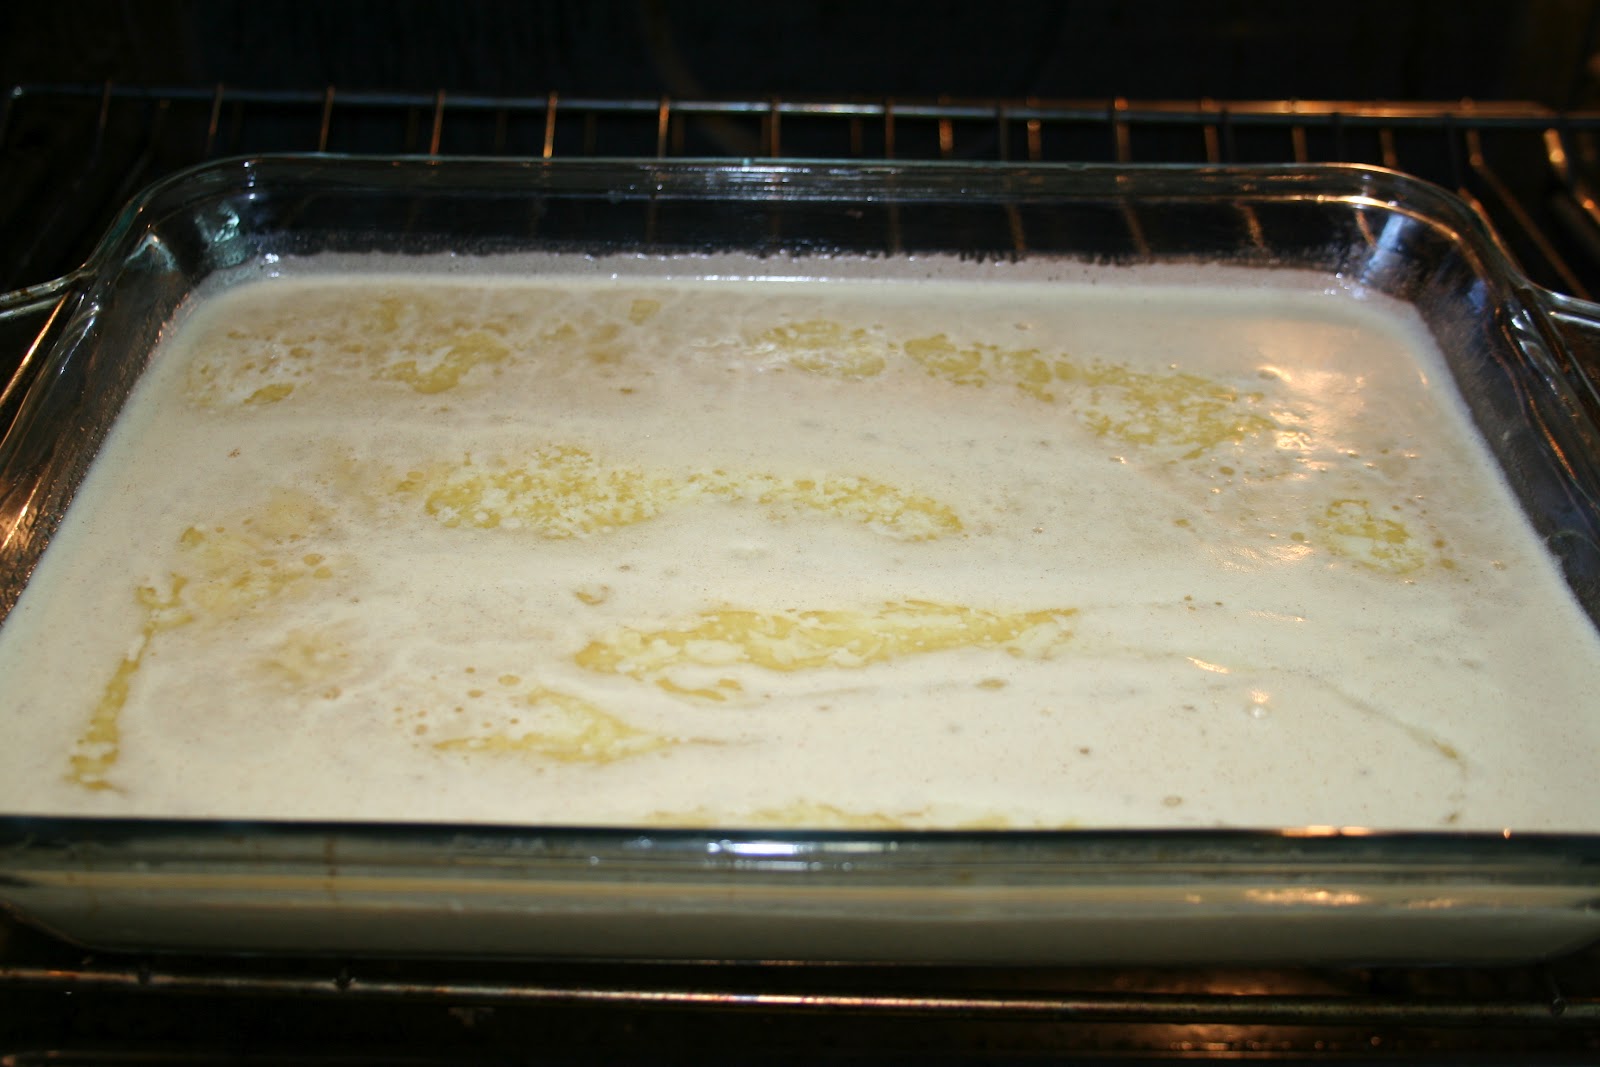 |
| Going in to the oven. |
 |
| Nice and puffy, ready to come out of the oven. |
|
| Ready to enjoy! |
Pin It
Wednesday, June 13, 2012
Budget tip for Laundry Detergent

I know this isn't Paleo, but it is budget, so I thought I would share it. A few months ago a friend shared her recipe for homemade laundry detergent and I started and using that instead of the store bought stuff. I've had some time to test it out now and wanted to share the results and recipe with you. One of the things I love about it besides saving money, is that is works wonderfully for removing the "sour" smell from towels. I had washed my towels in just about everything imaginable but could never get rid of that smell. But after using this detergent, there is no more "sour" smell! And I have found our clothes are getting nice and clean. I use just 2 TBSP for my light loads and wash on warm, 2 TBSP along with some bleach for my whites and wash in hot, but for my darks I only use 1TBSP and wash on cold (which is most of my laundry). And last but not least I wash all the bedding and towels with 1 TBSP and on hot.
(Please be sure so see my ***update*** at the bottom of the page)
The "recipe" is pretty simple, you will need the following:
1 cup Borax
1 cup Washing Soda (which is different from regular baking soda)
1-Bar of Fels-Naptha finely grated
fine grater
bowl or container for mixing and or storing
I start by finely grating my bar of Fels-Naptha on my box grater, in only takes a matter of minutes and I find it quite easy. Some however, prefer to use their food processor for this step. Then combine your shredded soap with 1 cup of the borax and 1 cup of the Washing Soda in a small container (I like to use an airtight container). Give it some good shakes, or you can stir it and you're ready to go. I have an extra one tablespoon measurer, that I just keep with my soap for convenience. It does have a slight scent when it's dry but the clothes don't come out smelling scented. Apparently you can add scent, but I haven't felt the need to do that and just like it as is. That's it, pretty simple and easy, and works as well if not better than the more expensive stuff I was using (Gain or Tide).
 |
| What you will need, Washing Soda $3.24 per box , Borax $3.38 per box and Fels-Naptha .97 cents per bar (all prices are from Walmart, Eureka, CA, 06-14-12). |
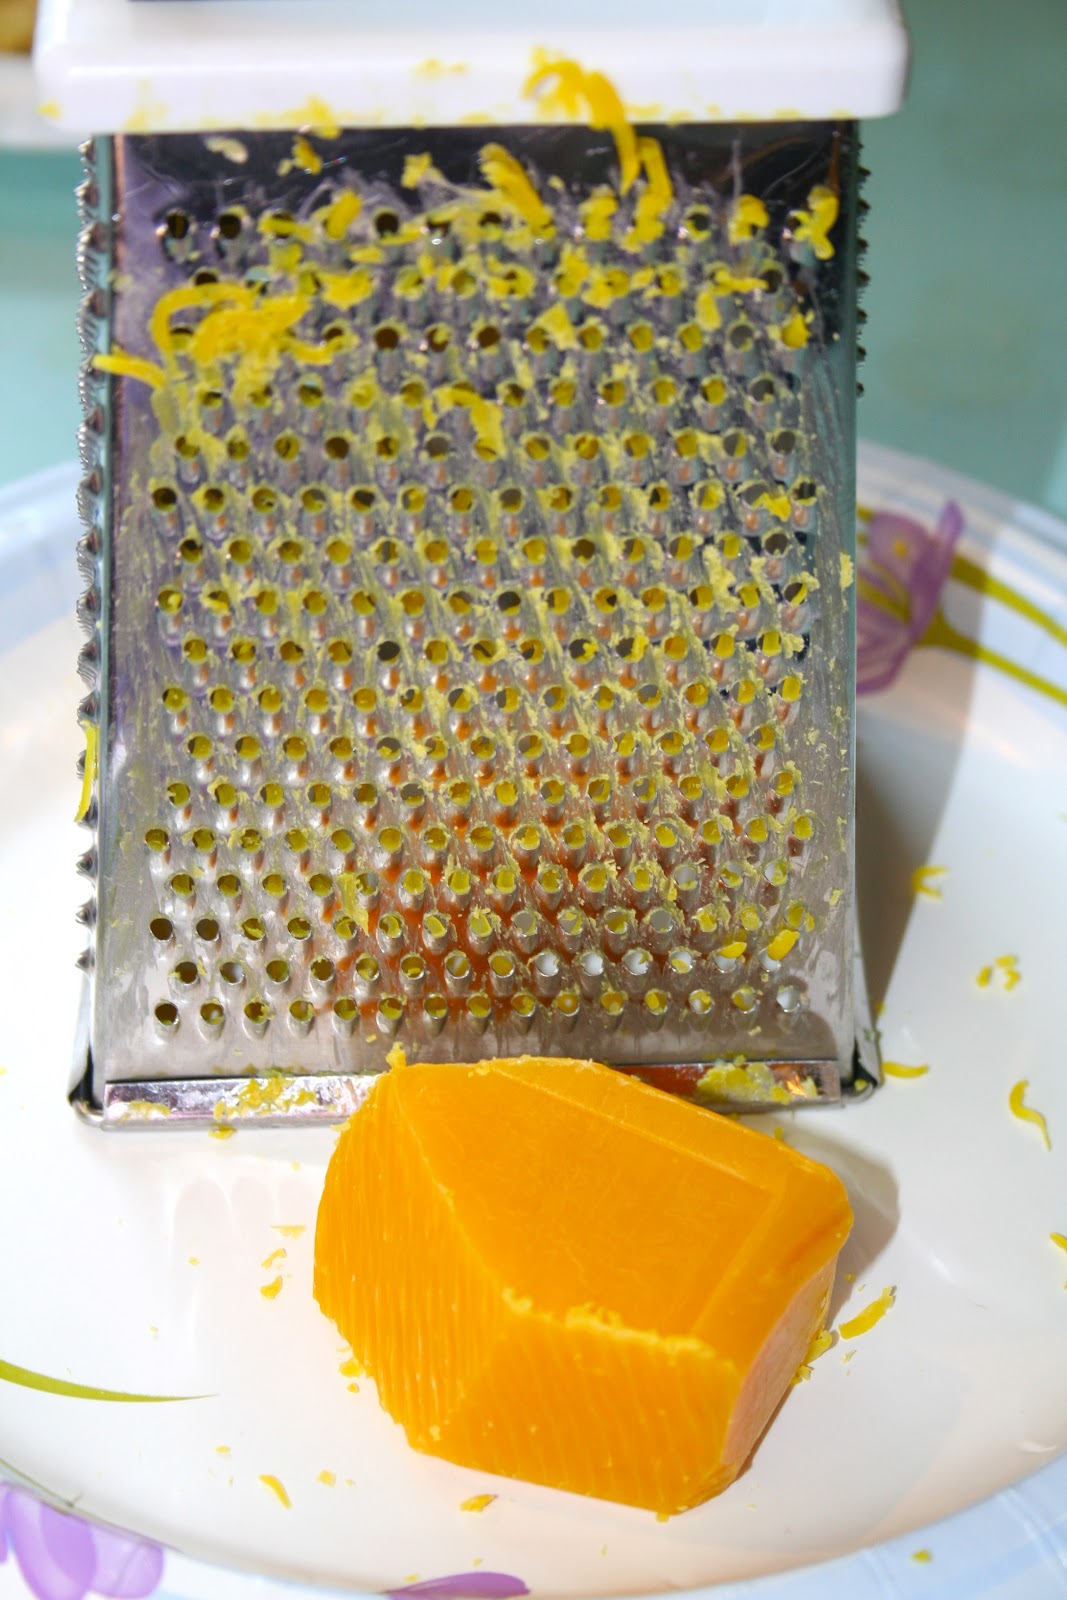 |
| Grating the bar of soap. |
 |
| The finely shredded Fels-Naptha. |
 |
| All mixed up and ready to go. |
BEFORE mixing in the food processor.
 AFTER the food processor.
***UPDATE***
I had a box of borax that had been sitting around for a long time and had absorbed moisture. It had lumps the size of tennis balls in it that were hard to break up. A friend had mentioned mixing her detergent in her Ninja, so after I grated the soap and mixed it all up, I dumped it all in my food processor and let it process until the mixture was a nice fine texture. No more lumps, but what I found out was that I prefer the texture, too, the soap mixes in better and is easier to scoop etc. So this is now the method I am using to combine it, I would suggest not standing over the food processor while it's processing. You don't want to breathe it in, if you can help it, but that's my only caution.
 Kaitlynn grating the soap, the girls love this job!!
 In the food processor.
 My final product, nice and fine.
Pin It

***UPDATE***
I had a box of borax that had been sitting around for a long time and had absorbed moisture. It had lumps the size of tennis balls in it that were hard to break up. A friend had mentioned mixing her detergent in her Ninja, so after I grated the soap and mixed it all up, I dumped it all in my food processor and let it process until the mixture was a nice fine texture. No more lumps, but what I found out was that I prefer the texture, too, the soap mixes in better and is easier to scoop etc. So this is now the method I am using to combine it, I would suggest not standing over the food processor while it's processing. You don't want to breathe it in, if you can help it, but that's my only caution.


Subscribe to:
Posts (Atom)