This was originally my pancake recipe but we've been using it to make wonderful waffles for a while now. It makes waffles that are nice and crunchy on the outside, yet fluffy on the inside. And the taste is out of this world topped with some fresh whipping cream (or whipped coconut milk), maple syrup and berries.
Delicious Grain Free/"Paleo" Waffles
2 cups almond meal (I use my own homemade almond meal/flour)
4 eggs
1/2 cup sparkling water ( I like to use one with Orange essence), you may use regular water but the sparkling water is what helps make them fluffier.
4 TBSP oil of your choice (if you use coconut oil, be sure to melt it first)
1-2 TBSP maple syrup
2 tsp vanilla
2 tsp cinnamon (optional)
1/2 tsp sea salt
1 tsp baking soda
Preheat your waffle iron. In a medium mixing bowl combine all of the dry ingredients and mix well. Then add the all the remaining wet ingredients and mix to combine. Next using a hand mixer beat the batter ingredients for 1 minute, this will help make a fluffier batter and better waffles. Lightly grease your waffle iron and place about 3/4 cup of batter (or the amount per the directions for your particular model of waffle iron). I cook my waffles for 5 minutes and they turn out perfect every time, but you will need to experiment with your waffle iron to find the amount of time that works best for yours. Remove from waffle iron and serve with your desired garnishes.
Pin It
Saturday, June 30, 2012
Sunday, June 24, 2012
How to make your own Almond Meal and Nut Butters
Here is the post I've been promising you all, on How to Make Your Own Almond Meal and Nut Butters. Being the budget minded person that I am, I was so thankful to have friends who shared with me just how easy it is to make almond flour and nut butters. If it weren't' for their reassurance I don't know if I would have ventured to give it a try. I've done some experimenting with different methods of making both, and I'm looking forward to sharing with you what I've found to be the simplest, easiest way of doing it.
raw almonds (I use these from Costco)
Coffee grinder
sifter
bowl or container for sifting the flour into
It is a really quick process, repeat the steps until you have the desired amount of almond meal, store in an airtight container (and in the freezer for longer storage if you like). That's it, it's that simple.
Pin It
To view larger, just click on the You Tube link in the right hand corner.
To make Almond Meal/Flour you will need the following:raw almonds (I use these from Costco)
Coffee grinder
sifter
bowl or container for sifting the flour into
- Place a small amount of almonds (like you would coffee beans) in your coffee grinder. I have a Krups which works great for this, I however only use it for making almond meal and don't suggest using it for both coffee and among meal.
- When you are ready push the button or on my model the lid, and let it grind, I usually give it a few shakes while grinding. It will only take a few seconds to process, it's amazing how quick it is. Check after a few seconds to see if the grind is fine enough, if not process a little more until it's your desired texture, you just don't want to let it go to long or it will start to turn into almond butter.
- When it reaches the desired texture or grind pour into your sifter and sift away. Any remaining chunks of almond that are to large can be reground with the next batch, on their own, or throw them in with your next batch of almond butter.
To Make Almond Butter:
raw almonds (I use these from Coscto)
Jelly roll pan or other large baking pan
Food Processor
sea salt (if desired)
Coconut oil (if desired)
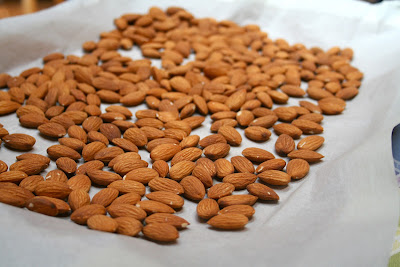
- Start by preheating your oven to 350 degrees.
- Spread desired amount of almonds out into your pan, 2-3 cups is usually good depending on the size of your food processor. Mine is an 11 cup Cuisanart and handles 2 cups with ease, 3 cups or more requires a little assistance from me along the way.
- Place pan in the oven and bake for 10-15 minutes to toast the almonds.
- Remove almonds from the oven and pour into your food processor with the regular blade attachment on ( do this directly from the oven and don't cool them off).
- Turn on your food processor and let it grind away, that's it. When I do larger amounts I sometimes have to stop it part way and stir so the sides get mixed in well. But when I do 2 cups I just let it go and walk away. It does it all on it's own. I generally don't add oil and just let mine grind until it's pretty soft and runny in texture.
- However, if you want to up your consumption of coconut oil, or maybe you just prefer the taste, you made add 1-2 TBSP of coconut oil, macadamia nut oil or any other desired nut oil, part way through the process. I add it when it starts to get a little dry and crumbly, which is about half way thru the process.
- If you like you may also add a pinch of sea salt near the end.
Once again a very easy process, and so good!! I love it when it's fresh and still warm, yum! You can do the same with any nut you like, I also like to make sunflower seed butter too. I watch them very closely while roasting and give them a stir now and then. But processing them is the same technique, I do add some oil to my sunflower seed butter, otherwise it just seams to be to dry. You can experiment with the oils too, I like using some Macadamia Nut oil, it adds a wonderful flavor.
So there you have it, both processes are really quite simple and can save you a little money too. I figure making my own almond meal saves me about .50-.60 cents per pound. And making my own almond butter saves me about $1.50 per pound, and it puts you in control of what goes in to it (like combining nuts etc, ). You can also experiment with adding some flavoring to your nut butters, like vanilla, cinnamon, cocoa powders, honey, etc. I would love to hear what kind of combinations you come up with. I hope this post has been both helpful and inspiring! Enjoy!
Pin It
Subscribe to:
Comments (Atom)


