Wednesday, June 13, 2012

Budget tip for Laundry Detergent


I know this isn't Paleo, but it is budget, so I thought I would share it.  A few months ago a friend shared her recipe for homemade laundry detergent and I started and using that instead of the store bought stuff.  I've had some time to test it out now and wanted to share the results and recipe with you.    One of the things I love about it besides saving money, is that is works wonderfully for removing the "sour" smell from towels.  I had washed my towels in just about everything imaginable but could never get rid of that smell.  But after using this detergent, there is no more "sour" smell!  And I have found our clothes are getting nice and clean.  I use just 2 TBSP for my light loads and wash on warm, 2 TBSP along with some bleach for my whites and wash in hot, but for my darks I only use 1TBSP and wash on cold (which is most of my laundry).  And last but not least I wash all the bedding and towels with 1 TBSP and on hot.  


(Please be sure so see my ***update*** at the bottom of the page) 


The "recipe" is pretty simple, you will need the following:


1 cup Borax
1 cup Washing  Soda (which is different from regular baking soda)
1-Bar of Fels-Naptha finely grated
fine grater
bowl or container for mixing and or storing


I start by finely grating my bar of Fels-Naptha on my box grater, in only takes a matter of minutes and I find it quite easy.  Some however, prefer to use their food processor for this step.  Then combine your shredded soap with 1 cup of the borax and 1 cup of the Washing Soda in a small container (I like to use an airtight container).  Give it some good shakes, or you can stir it and you're ready to go.  I have an extra one tablespoon measurer, that I just keep with my soap for convenience.  It does have a slight scent when it's dry but the clothes don't come out smelling scented.  Apparently you can add scent, but I haven't felt the need to do that and just like it as is.  That's it, pretty simple and easy, and works as well if not better than the more expensive stuff I was using (Gain or Tide).  

What you will need, Washing Soda $3.24 per box , Borax $3.38 per box and Fels-Naptha .97 cents per bar (all prices are from Walmart, Eureka, CA, 06-14-12).

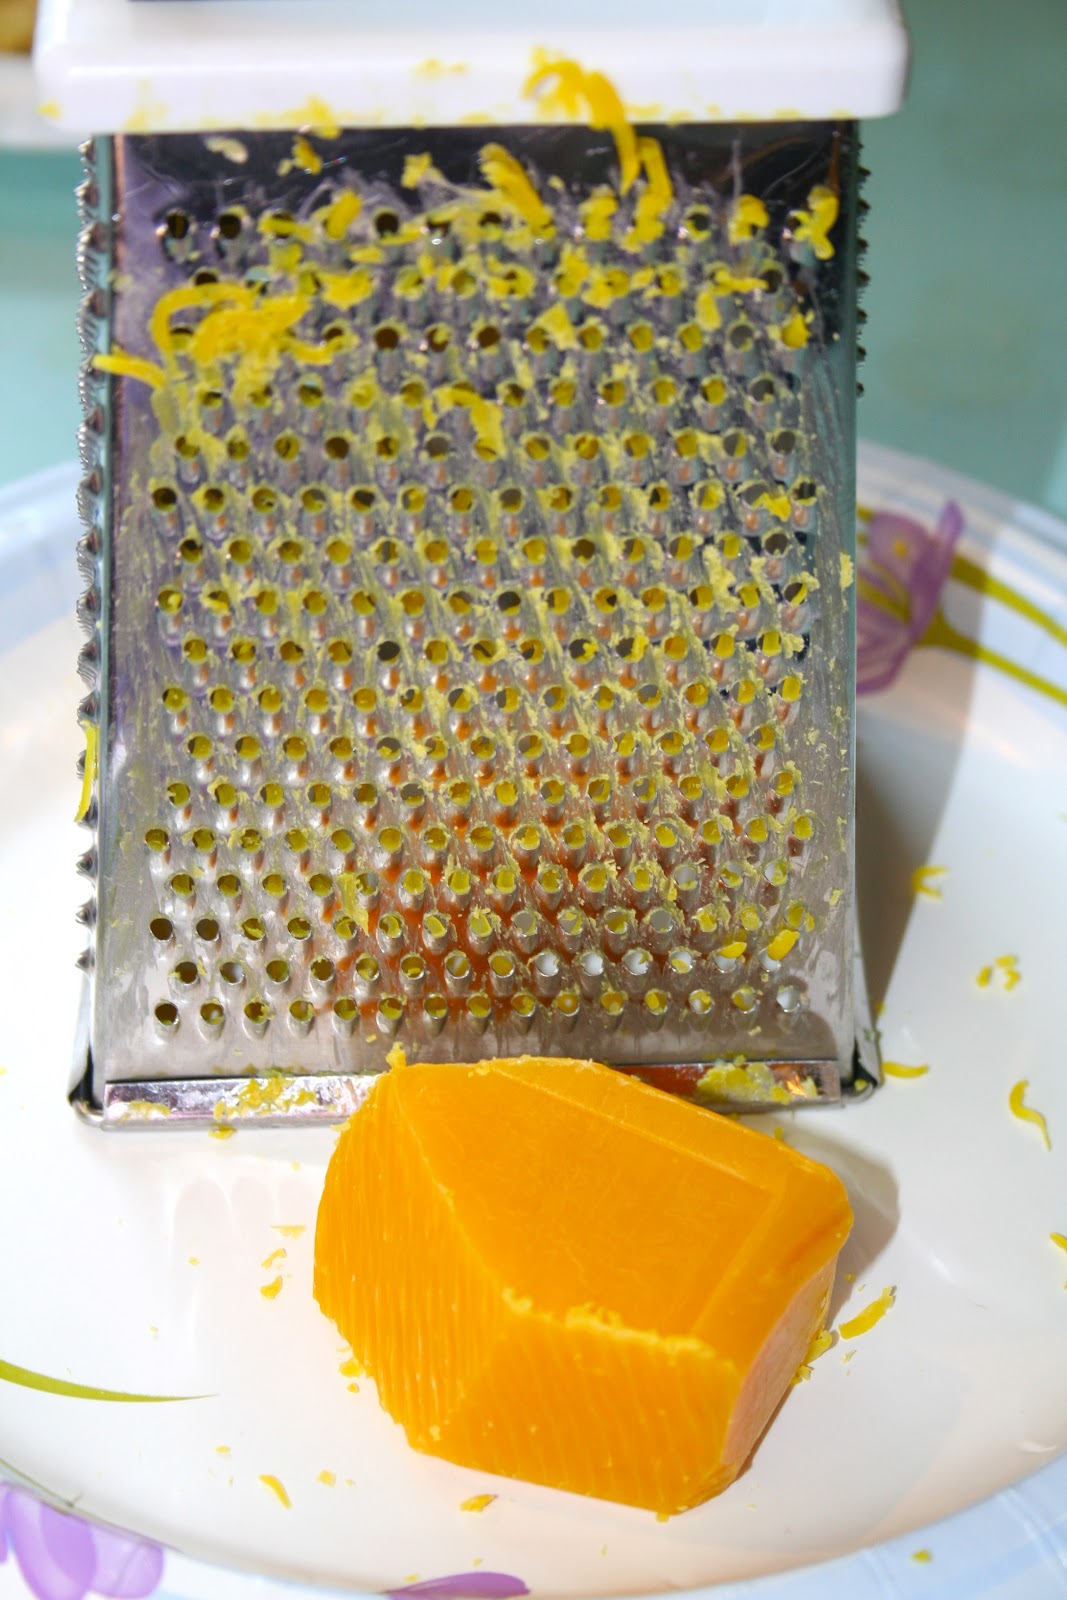
Grating the bar of soap.

The finely shredded Fels-Naptha.

All mixed up and ready to go.

BEFORE mixing in the food processor.
AFTER the food processor.


***UPDATE***
I had a box of borax that had been sitting around for a long time and had absorbed moisture.  It had lumps the size of tennis balls in it that were hard to break up.  A friend had mentioned mixing her detergent in her Ninja, so after I grated the soap and mixed it all up, I dumped it all in my food processor and let it process until the mixture was a nice fine texture.  No more lumps, but what I found out was that I prefer the texture, too, the soap mixes in better and is easier to scoop etc.  So this is now the method I am using to combine it, I would suggest not standing over the food processor while it's processing.  You don't want to breathe it in, if you can help it, but that's my only caution.  
Kaitlynn grating the soap, the girls love this job!! 
In the food processor. 
My final product, nice and fine.
Pin It

Sunday, June 10, 2012

Grilled Paleo Jalapeño Bacon Burger on Portobello Mushroom "buns"

Who doesn't love bacon and burgers?  I know I do, that's what prompted my experimentation with this burger.    I found the secret to grilling these is to keep the briquets somewhat cool (around 250 degrees) and I kept a spray bottle near by for flare ups.  That combination worked beautifully and the end result was stunning and delicious burgers!


BACON JALAPEÑO BURGERS 
on
 PORTOBELLO "BUNS"

1 pound bacon ends ( I love Beelers, I've tried a few others but found them to salty)
2 pounds 85% grass fed ground beef
3-4 Jalapeños (depending on size), seeded,  unless you like really spice then leave some seeds in
1 cup roughly chopped sweet onion
1/2 cup roughly chopped red onion
2 large cloves garlic, chopped
a  handful of fresh parsley (or cilantro might be good)
3/4 tsp finely ground black pepper
1/4 tsp. sea salt ( I figure the bacon adds most of the needed salt)
portobella mushrooms if desired


  1. First start your charcoal so it will be ready to grill after you get these all assembled. 
  2. Next slice 1/2 a package of bacon ends into "strips" about 1" apart, then add to a food process with and process until it forms a ball.  
  3. Then remove and add to a large bowl along with your ground beef. 
  4.  Roughly chop your onions and add them to the food processor and pulse a few times until until finely chopped.  You want to be sure not to over process them, if you do, just drain off some of the excess liquid.  Then dump them into the bowl with your meat.  
  5. Now add the parley, garlic and peppers and pulse a few times until nice and small, add them to the bowl.  
  6. Next add your salt and pepper to the meat mixture and mix well with your hands. 
  7.  Form into patties in your desired size and grill. The key is to grill them at a lower temperature and spot any flare ups with a spray bottle.  Or you could just fry them up in a pan if you like.
  8.  I also grill my portobello mushrooms for a little bit, to give them that smokey/grilled flavor. 
 You can top them with guacamole, etc. we used lettuce, tomatoes and avocados and they were delicious. 
 Hope you enjoy them as much as we do.

Fresh veggies ready to be made into Bacon Jalapeño burgers.

Peppers and parsley after they are chopped in food proccessor.

Roughly chopped onions in the food processor ready to be minced.

My favorite bacon, and the one used in this recipe.

All the ingredients ready to mix, with the ground bacon on top.

Formed patty ready for the grill.

Grilled and ready to eat.

Burgers and "buns" grilling.


Time to eat!  Yum!


Pin It

Tuesday, June 5, 2012

Grilled Pizza (Grain Free and "Paleo" style)


In my last post I mentioned making an effort to let my girls help or prepare meals more often.  The following is the creation of my 9 year old daughter and I, and the photos are of her pizzas.  She mixed the dough first with a spoon and then kneading it with her hands ( she loved that part!).  I then divided the dough and rolled it out for her, we then pre-baked the crust, removed it from the oven and she then put all the toppings on and we grilled them.  Oh, I almost forgot she also mixed up the pizza sauce we used.  This was such a fun treat for them, we used to have pizza quite frequently on Friday nights pre-Paleo, so they really enjoyed it!  We have a large family so we had to repeat this process several times, ( I make triple this, but cut the recipe down for everyone), some we topped with Cheese and others we did not.  For grilled Pizza we like the crust rolled nice and thin and crispy almost like a cracker, Yum!  We hope you enjoy it as much as we do, feel free to change up the herbs and spices to whatever you like, and use your favorite toppings, too.


GRILLED GRAIN FREE/ "PALEO" PIZZA

2 1/2  cups of almond flour (you may need another 2-3 TBSP)
2 eggs
3 TBSP of good extra virgin olive oil (I like Kasandrinos Extra Virgin Olive oil (Kotinos)  )
1/4 tsp baking soda
1/2 tsp dried sweet basil (or any herbs, garlic etc. of your choice)


First thing you want to do is get your grill started, we used charcoal and some leftover mesquite wood chips for ours.  The key is to use very little briquets, you want a really low heat, like really low or it will burn.  Another option is to put most of the briquets on one end of the grill and use more of an indirect heat.  We started out with the rack on the lowest setting and as the coals cooled we just raised them and it worked wonderfully.  
Then preheat your oven to 350 degrees, and combine all of the above ingredients first with a spoon and then kneading and mixing well with your hands.   Next, take 2 sheets of parchment paper ( they need to be about the same size), I buy mine on a large roll from Costco and just tear it to fit my pan.  Take the desired amount of dough, depending on your pan size, and roll it tightly into a ball with your hands.  Place on one sheet of parchment paper on your work surface, then place the "dough" on the parchment paper, flattening slightly with your hands.  Take the second sheet of parchment paper and place over the top of the dough.  Then using a rolling pin, roll in all directions to get the shape and thickness desired (we did both rectangular in a jelly roll pan and round on a pizza pan).  I roll mine really thin (about a generous 1/8 inch), but 1/4 inch should be fine too.  Then remove the top sheet of parchment paper and using the bottom sheet of parchment paper slide the whole thing onto your desired pan (leaving it on the bottom parchment paper). Place in the oven either on the middle rack or one rack up from that (I usually have 2 going at a time and rotate the rack they are on), bake for 15-20 minutes.  Then remove from the oven spread with your Pizza Sauce and top with your desired toppings.  We love to mix it up, but Applegate Pepperoni is always a hit!    Then using the pan just slide the whole thing off onto the grill, and then remove the parchment paper by sliding the pizza off the paper while it is on the grill.  I found that to be the best technique for me, but use whatever works best for you.  Then close the cover on your grill and check it after a few minutes, I like to use a spatula to move it around on the grill so if I have a hot spot, it gets rotated.  Ours took about 10 minutes on the grill and we had our grill  at a really low heat.  Then using a spatula carefully direct the pizza to either the pan you started out with, a cutting board or other surface, cut, serve and enjoy!    This is a great recipe to get the kids involved with, they love mixing, rolling, and making their own pizzas!  Be sure to throw lot's of veggies in there too!  Mushroom, Linsey Natural Olives, tomatoes, peppers, sweet onion, zucchini, artichokes, etc.  


We look forward to experimenting with some pesto, pine nuts, chicken, etc. too later this summer!

*Next time we make this I will try to remember to get photos of the process, I personally love process photos and find them helpful.*


Pin It

Mom's Paleo Pizza Sauce


This is the wonderful Pizza sauce I grew up eating on my mom's homemade whole wheat Pizza, so naturally I was thrilled it's still works with Paleo!   I now eliminate the garlic as my 14 year old daughter is allergic, but other than that it's my mom's original recipe she's used for years.  Thank you mom!


Mom's Pizza Sauce

1-8 oz can organic tomato sauce
1- 6 oz can organic tomato paste
2 tsp dried minced onion
1 tsp. dried basil
3/4 tsp dried oregano
1/4 tsp garlic powder or granulated garlic


Combine all ingredients in a small sauce pot and simmer on the lowest setting while making the crust. 

Pin It

Monday, May 28, 2012

Musings on Memorial Day

I've been working on a couple of really yummy new recipes for you all, which I hope to remake (and photograph) this week and then get posted.  One of them I made the other night, but did not get photos of and let me tell you it is one really sensational burger!!
Since school is out for my children now, I have been involving them more and more in the preparation and making of our meals.  One thing I am being reminded of, is the more you involve them in the process, the less resistive they are to new foods and/or Paleo.  I let my 14 and 9 year old go through my 3 favorite Paleo cookbooks (Everyday Paleo, Make it Paleo and Paleo Comfort Foods) marking with sticky notes the pages of recipes they would like to try.  They ended up filling most of the books with stickies, I then had them narrow it down and each pick a complete meal (next week they can pick another one).  And I also asked them to each pick a treat they would like to try making during the week, I haven't seen them that excited over Paleo ever!  My 14 year old made Beef Kabobs, Oven Roasted Brussels Sprouts and Watermelon for dinner the other night, YUM!  And tomorrow night is my 9 year olds night to cook, although she will still need a bit of help.  She chose to make Paleo Pizza, which we made last week also (recipe to follow), this week if the weather cooperates we want to try making Grilled pizzas, one of our favorites!  My 9 year old has also been helping with the food prep, and she's been more excited about eating foods she never would have before (mind you she is my pickiest eater ever!).  I know it can take more time to involve them, but I really encourage you to get your children in the kitchen with you.  Even if it is just involving them in choosing the meals, they feel like they are more a part of it.  It is also a wonderful opportunity for one on one time with a child.  If your life is busy like mine, sometimes it's hard to slow down and take the time to just listen to them and be with them without being pulled in a million different directions, cooking is a great opportunity to do that.  I have also found that having a garden and involving them in the planting and care of it, helps tremendously!  My girls love helping with the garden and love eating it's bountiful harvest!  Last year they tried lot's of things they had previously turned their noses up at, simply because they had actively participated in growing them!
The other thing I want my children to understand is why we do what we do.  Today is Memorial Day, so I took the time to ask the kids this morning (after our Catechism reading) if they knew what Memorial Day was for.  That was an interesting discussion, but an important one.  It got me to thinking, how many things we do on a day to day basis without really teaching them why, why we celebrate certain holidays (and not others), why we as a family have chosen to eat Paleo, why we are Christians, why we have our children in a small private school, why we grow our own veggies, why exercise and fresh air are important to us, why, why, why....  The list can go on and on, life is full of what I like to call opportunities and to often I forget to slow down and take those opportunities.   Which is one of my goals this summer, to really focus on making those "connections" for them and involving them more.   I want them to know and understand why we eat the way we eat and do what we do and even how that connects to our faith.   I guess it's a little bit like stopping to smell the roses!  Life goes by way to quickly to miss those opportunities.


Pin It

Saturday, May 19, 2012

"Paleo" Custard Sauce

Being budget minded, I just knew I had to find a use for all those extra yolks after making Crepes (I have modified my crepe recipe as of today).   This Custard Sauce is what I came up with, it's a fun to eat it in the crepes topped with my fruit sauces.  My suggestion would be to separate the yolks out the night before and make the custard sauce, Blueberry Sauce, and Strawberry Sauce in advance (storing them in the fridge).  Then in the morning you can pull them out, make your crepes and warm up the sauces if you would like,  serve,eat, and enjoy!  I particularly like the blueberries with the custard sauce, and have not tried the strawberry.  But I can say the blueberry sauce with the custard filled crepes were delicious!  


"PALEO" CUSTARD SAUCE

8 egg yolks 
1 can of full fat coconut milk ( I used Thai Kitchen)
3-4 TBSP honey or maple syrup
1/4 tsp-1/2 tsp vanilla (start with less and taste) 
dash of salt


Start by heating your coconut milk and honey/maple syrup and sprinkle of salt over medium heat for about 5-6 minutes until milk becomes a little hot.  Then remove from heat and slowly whisk a little of the "hot" milk into the egg yolks.  Don't add it all, just about 1/3-1/2 of the mixture.  Then add the egg mixture to the milk in the pan, whisking while you add it.  Place the pan back on the burner and heat over low heat (about 3 on my electric range), stirring constantly ( whisk works well), until it begins to thicken up a bit.  You don't want it to boil, just thicken up.  When it reaches your desired thickness, remove from heat, add your vanilla, and allow to cool, placing a piece of plastic wrap on it will help keep it from forming a skim if that bothers you.   You can either serve warm or cold, my preference is cold, but it really does not matter.  If it should curdle on you, an easy way to save it is to throw it in the blender, that will smooth out any curdles and give you a smooth sauce once again.  So it's really quite simple and easy.    Spread in crepes and top with some fruit sauce and enjoy.
Crepe spread with custard sauce and topped with blueberry sauce.
Ready to be wrapped up.


Pin It

Paleo friendly Blueberry Sauce/Spread Recipe

After enjoying my STRAWBERRY SAUCE recipe so much, I started thinking a blueberry sauce would be good too. For the blueberry sauce, I subbed organic frozen Blueberries from Costco for the fresh strawberries and  came out with a wonderful sauce.  This will be a great accompaniment to my CREPE recipe, or on a variety of other items ( like maybe pancakes, ice cream, etc.) I'm sure you can come up with some great ideas for it.

BLUEBERRY SAUCE

4 cups organic frozen blueberries (slightly thawed)
1/2 cup thawed, frozen apple juice concentrate
1 tsp. grated orange zest
1/4 tsp. cinnamon (I use Saigon)


Combine all ingredients in a small saucepan and bring to a boil over medium heat.  Once it hits a boil, keep it on medium and let it boil for 10 minutes, stirring occasionally.  Then reduce heat to low and simmer longer if needed, you are just looking for the fruit to soften and for a nice constancy.  Keep in mind though, that the sauce will thicken a bit when removed from the heat.  Cool slightly and serve.  Or store in pretty jars in your refrigerator after it cools completely.  YUM!


Blueberries, apple juice and orange peel ready to cook.

Yummy Blueberry Sauce
Blueberry Sauce in jars.

Blueberry and Strawberry Sauces


Pin It